I've decided to start a new weekly series called "Tutorial Tuesday" where I, obviously, post tutorials on stuff. It may be digital or design related, it may be crafty, it may be easy and it may be a little bit more difficult... who knows what each week will bring! It will run until I run out of ideas or things to teach so if you have any requests, please feel free to leave them in the comments!
To start off the series I'm going to teach you how to design your own blog button using the awesome online photo editor called Pixlr. This tutorial is for people who have little to no experience with graphic programs. It's almost identical to Photoshop Elements and pretty darn close to Photoshop as well. Best of all, it's free, so it's accessible to anyone. There are several Photoshop-like features it's missing but for the average user who isn't a graphic designer it should be all you need. So, let's begin!

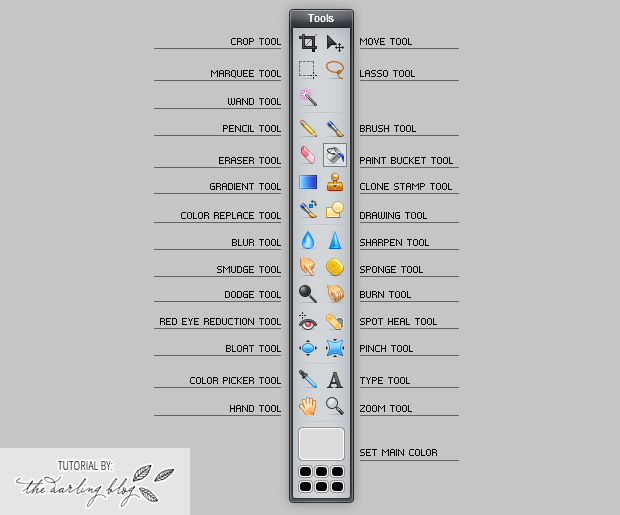
For Step 1, we're going to get familiar with the toolbar. If you're used to Photoshop or Photoshop Elements you can probably skip this step. If you're not, review the image above. For this tutorial, we will be using the Type Tool, Move Tool, Paint Bucket Tool, and Set Main Color. Of course, you can get as creative as you want with your own button but I'm just going to teach you the basics to get you started.

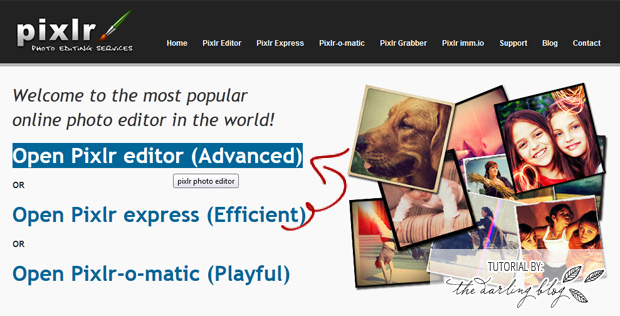
Now that you've familiarized yourself with the Pixlr toolbar, let's get started. Go to pixrl.com and select Open Pixlr editor (Advanced) (<-- or click that link).

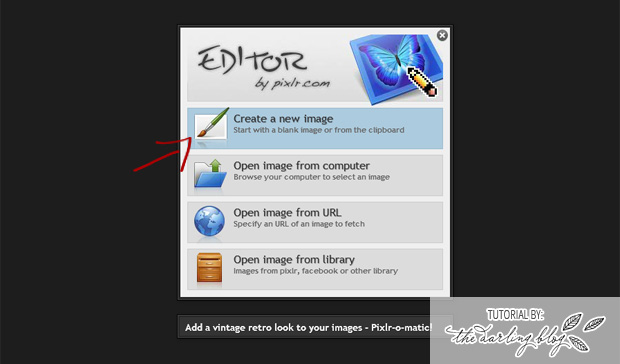
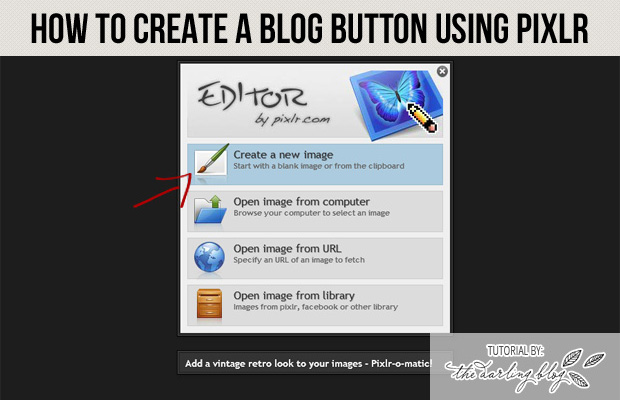
Now, we're going to select Create a New Image to start with a blank canvas. In Step 4 we'll choose the size.

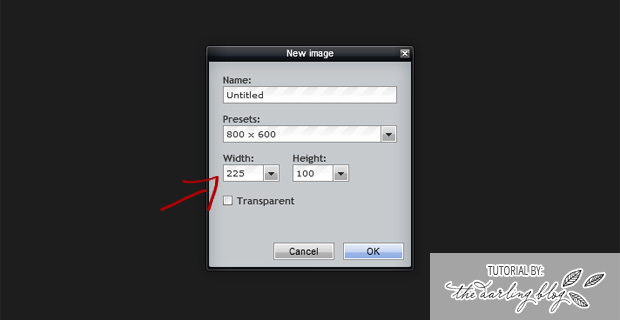
You can choose from a preset size under Presets or you can choose your own size like I did. My sponsor swap button sizes are 225x100 so that's the size I chose. If you'd like to create a button to add to my sidebar, choose this size! Or, pick your own size for your own needs. After you type in both the width and height numbers, click OK.

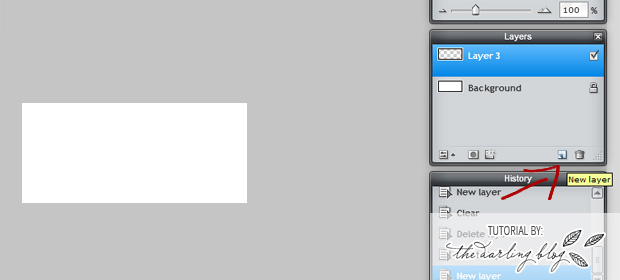
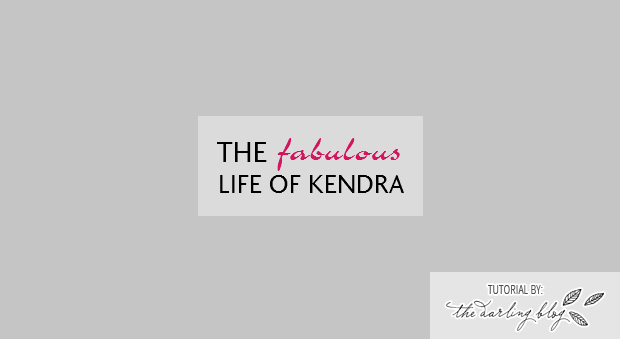
Whew! Now that we got all the specifics out of the way we can get to the good part. In the top image, I added a new, transparent layer. This part isn't really necessary per se, but it's just something I always do... for whatever reason. Once you do (or don't do) that, you can select the Paint Bucket tool to add a background color for your button. To choose a color, click on the Set Main Color box. If you want to add a pattern or texture, you'll have to select Layer > Open image as layer and then find the background image you want to use. Unfortunately, the fonts you have downloaded on your computer don't show up here. You just have to use the ones provided by Pixlr but they do have some pretty good choices and they also have quite a few choices so surely you're able to find something suitable. Another thing worth mentioning is you will have to create a new text layer for each font, color, or size difference. For the image above, I had to use 3 different font layers: One for THE, one for FABULOUS and one for LIFE OF KENDRA. Just play around, have fun, and be creative as possible!

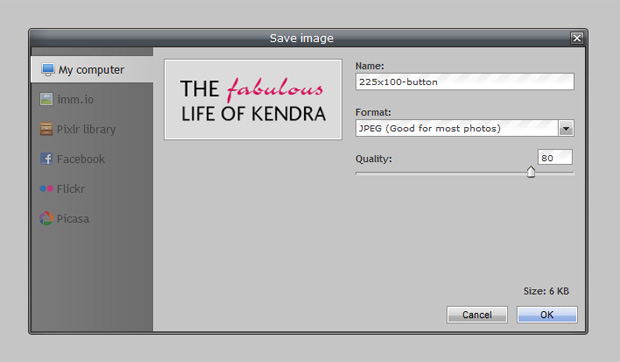
Once you get your button perfected, it's time to save. The cool thing about this is you can save it to your computer, your Flickr account, your Picasa account and more! Just select the location you'd like to save it to, choose the Quality (it defaults to 80 which should be fine for buttons) and click OK then Save. You've now created your button!

This is a great tutorial, I love learning new stuff so it's fantastic that you're going to make this a regular feature!
ReplyDeleteThis comment has been removed by the author.
ReplyDeleteoooh! I'm always on the lookout for free, Photoshop alternatives. thanks for sharing this one!
ReplyDeleteSometimes the things I do there get a bit pixrly or something, it's really weird. Normally when I copy and past stuff, can u help?
ReplyDeleteHi, i am arjun, i am interested in writing, now i read your article how to create a blog, very nice i am also going to create a blog thanks for your information
ReplyDeleteExplore trending hashtags and develop a strategy for your content. https://capcut.blog.fc2.com/blog-entry-1.html
ReplyDeleteLearn digital design Logo, Brochure, Banner, Illustrations + Social Media Banners + psd. Learn Advanced Graphic Designing Modules with 100% Practical Training in Chandigarh. 100% Job Guarantee.
ReplyDeleteGraphics Designing Course in Chandigarh
These buttons really stand out personalized buttons
ReplyDelete