As most of you know, Google Friend Connect no longer works on non-Blogger blogs/websites. When I set up this blog (then titled The Single Momoirs), I had manually set up a Followers widget through the now defunct Google Friend Connect website. Because it was set up for a different URL, when GFC was disabled, so was my widget on this blog and all of my followers were gone (wahh!). When I added the new GFC widget to this blog automatically through Blogger's "Add a Gadget" option I noticed the follower count and accompanying "Members" text was white. This has driven me insane for months. I Googled like crazy and could not find a solution. I found many topics about this in Blogger's support forum but no results. Well, I finally found a fix and today, I'm going to tell you how. It does a little bit of digging through your page source code but it shouldn't be too hard. Ready?
1.) First of all, copy and paste the code below in Notepad, Notepad ++ or some other text editor. You will need it in a minute.
2.) Now, with the Followers Gadget enabled on your blog, go to your blog, right click and click on "View Page Source" (or the equivalent based on your browser). Copy the code below and search for it within your source. To do this, you will click "Edit > Find."
Once you find this block of code it will look similar to this (the one below is mine):
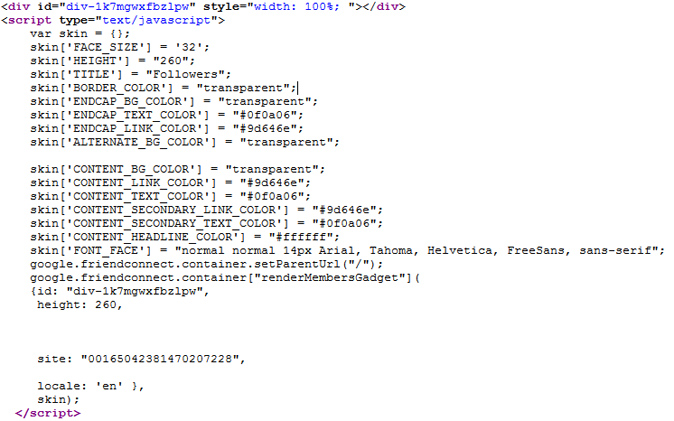
3.) Now, look toward the bottom where it has "id:" and "site:" with a string of letters and/or numbers. The first one will look similar to "div-1k7mgwxfbzlpw" (this is mine). Copy that and go back to the text editor you pasted the first step into and paste that string of code where it says "YOUR ID." There will be a location at the top and bottom - make sure you put it in both places. Now, go back to your page source and copy the second string of code that will look similar to "00165042381470207228" (again, this is mine). Go back to your text editor one more time and paste that where it says "YOUR SITE ID" at the bottom (the only location). You can then configure the colors to match your template where you see the HEX codes or keep it as default. To change the width, find where it says "style="width:300px;" and type in whatever number fits the width of your sidebar.
4.) Copy that entire code with your edits, go to Blogger, click on "Add a Gadget", choose "HTML/Javascript", and paste that into the HTML box. Save, re-arrange if necessary and voila!
Hopefully this wasn't too confusing. I'm pretty horrible at explaining things (which is why there are no other tutorials on here) but maybe this will help any of you who had the same problem. Let me know if you have any questions and I will do my best to help you out!

I love you for this!!!
ReplyDeleteI had searched everywhere; removed and reloaded. hated how it looked.
Now it really stands out so it is easy to follow!
Your tutorial was so so easy to follow - thanks!
Super genius! This is works like champ. Thanks for sharing the trick.
ReplyDelete-Honeybee
http://herweightlossdiary.blogspot.com
Thanks heaps! I didn't copy your code, but your post gave me the confidence to copy my own code from page source and then change it to alter the height and width of the GFC widget.
ReplyDeleteThis is great - thanks! But do you know how I can change the word "Members" ??? That's been making me crazy and I can't find a solution. Would love your advice on that. Thank you :)
ReplyDelete